This theme’s header is divided into 4 different parts which can be styled differently as per your requirement. These are the 4 parts:
All the details about of these parts are described below:
Topbar/Toprow

This area of the header can be enabled for any of the main header style(as described below). Topbar is divided into 2 separate columns, one at the left and the other at the right. At the left column you can show social icons linked to your social media profile URLs. The right column can display a menu(assigned to ‘Top Menu’ location) or some custom text. All the options for the Topbar can be found at your WP Dashboard => Native Church => Theme Options => Header => Topbar
Enable/Disable Topbar

Left Column

Social media icons for the Topbar left column can be sorted up/down using the icon(shown in point 3 of the above image), the field at the top will show first in the website frontend and so on. Social media website name can be seen in the icon class name(shown in point 1 of the above image) and the profile URLs can be inserted in the field(as shown in point 2 of the above image). Make sure that you input your full social media profile URL in the field to be able to show the icon on the frontend. For example: https://facebook.com/imithemes
Right Column

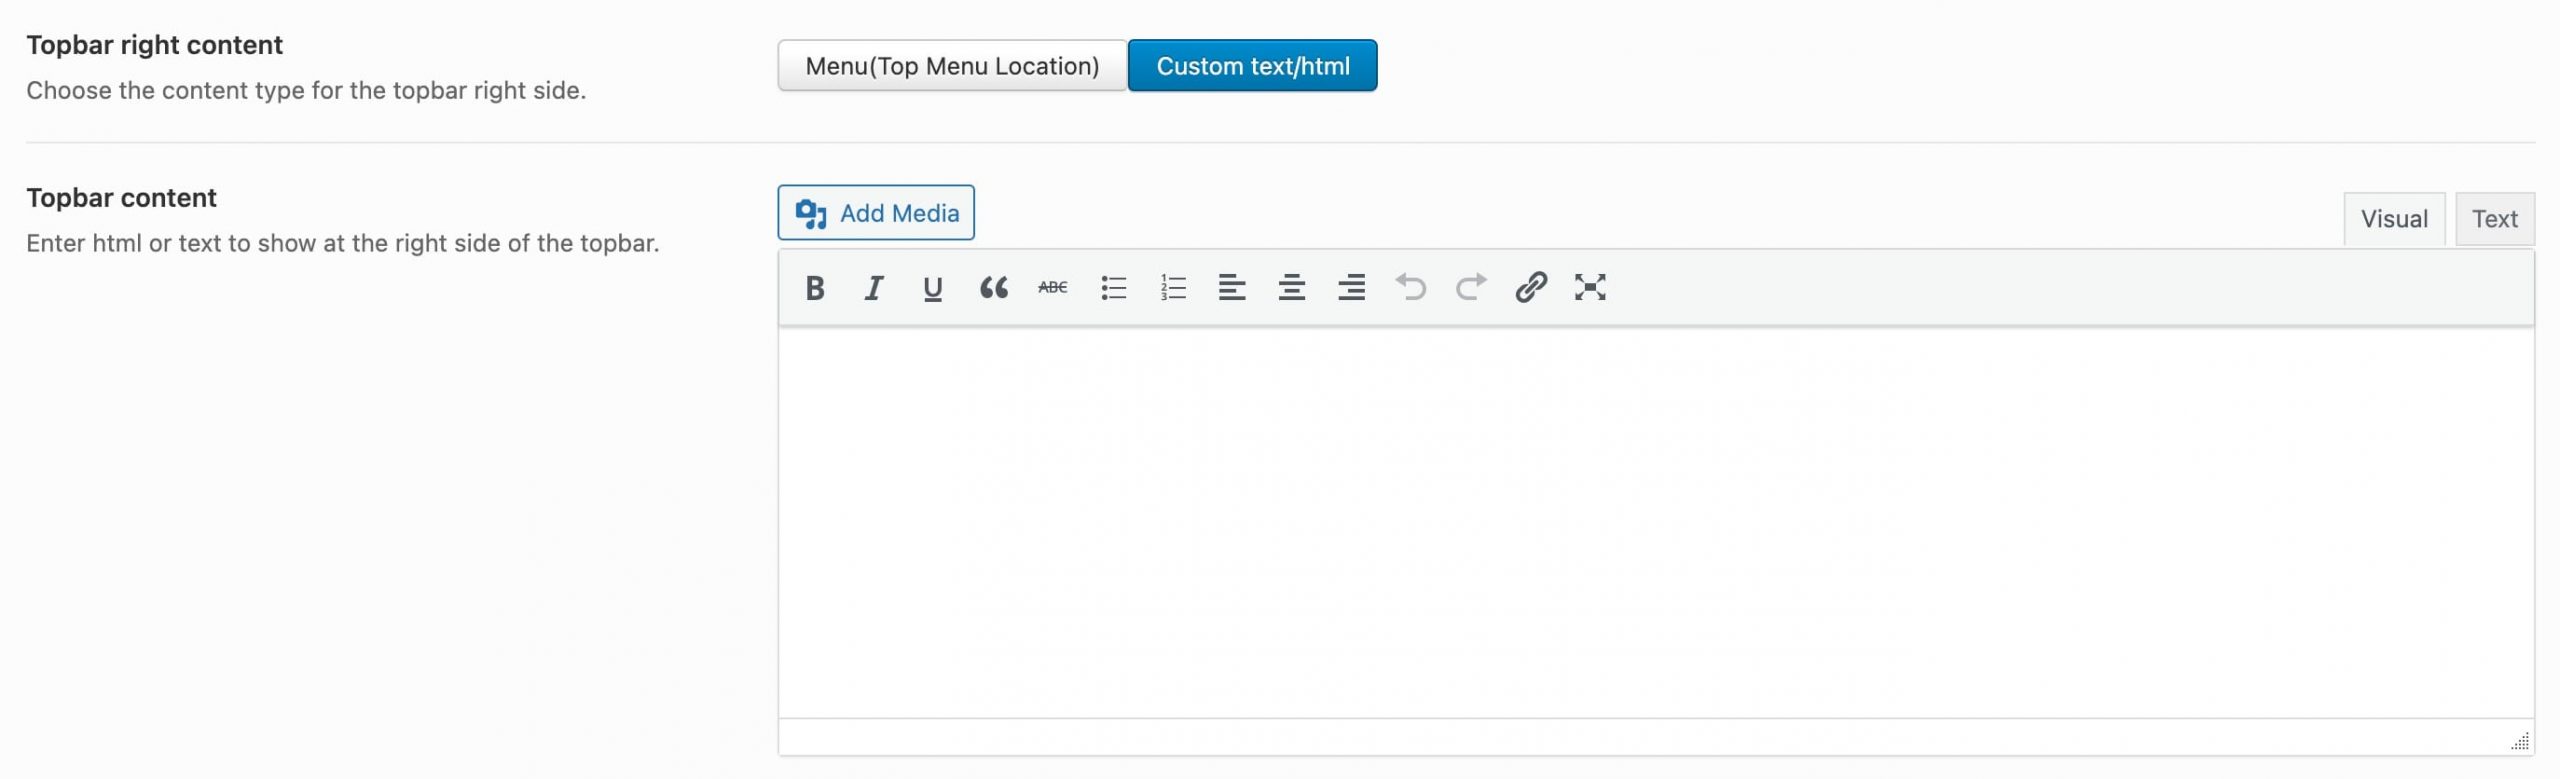
Choose your content type option for the Topbar’s right column. When Menu(Default) is selected then it will show menu(assigned to ‘Top Menu’ location) unless you choose to display a selected menu in the field below:

When “Custom text/html” is selected then you will get a new field to enter your custom text which will show at the right side of the Topbar. Make sure enter some limited text here as the Topbar height is limited and won’t be able to cater big content there.
Main Logo/Menu header
This part of the consists of your website’s logo and the main menu There are 6 different styles to choose for this area. These styles can be set globally for the full website or can be set individually for different posts/pages.
Global
All the header settings for the global site header can be found at your WP Dashboard => Native Church => Theme Options => Header
Header Style:
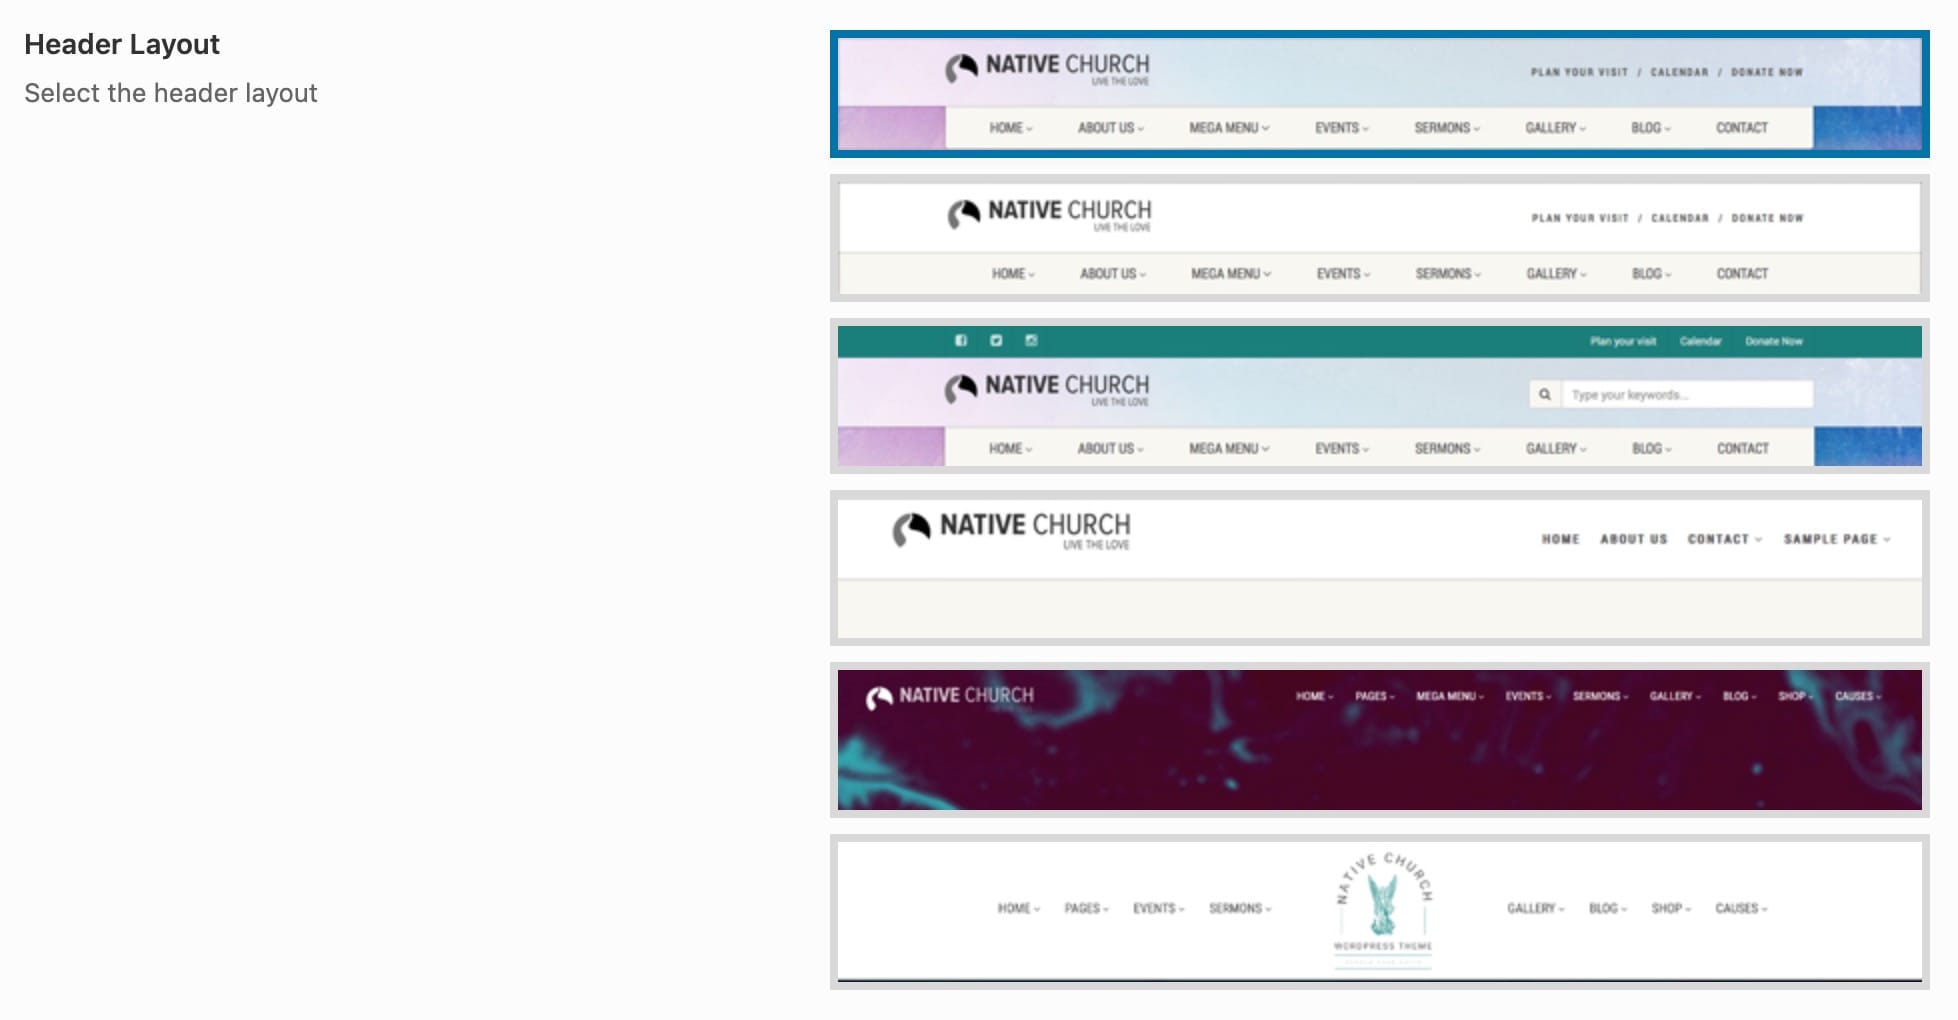
Style 1 – Logo at the left, Top menu(location) at the right and floating Primary Menu(Location) below.
Style 2 – Logo at the left, Top menu(location) at the right and full width Primary Menu(Location) below.
Style 3 – Logo at the left, Search form at the right(can be replace with any custom text) and floating Primary Menu(Location) below.
Style 4 – Logo at the left and Top menu(location) at the right.
Style 5 – Transparent header with logo at the left and Primary Menu(Location) at the right.
Style 6 – Logo at the center and Primary Menu(Location) divided in to 2 parts on both the sides.
Header Width:

Width of the header can be set to use 100% of the browser area which means it will stretch the whole header area including the Topbar.
Header Height:

Height of the header is not flexible by default to keep the layout in control in case of using non properly resized logo image. But the height of header can be adjusted from the field as shown above. Default value here is 80 which means 80px. Do not enter any unit like ‘px’ in this field.
Header Background:

Here you can set either a background color(can be translucent) for the header(Logo area) or can upload an image for the same.
Page Specific
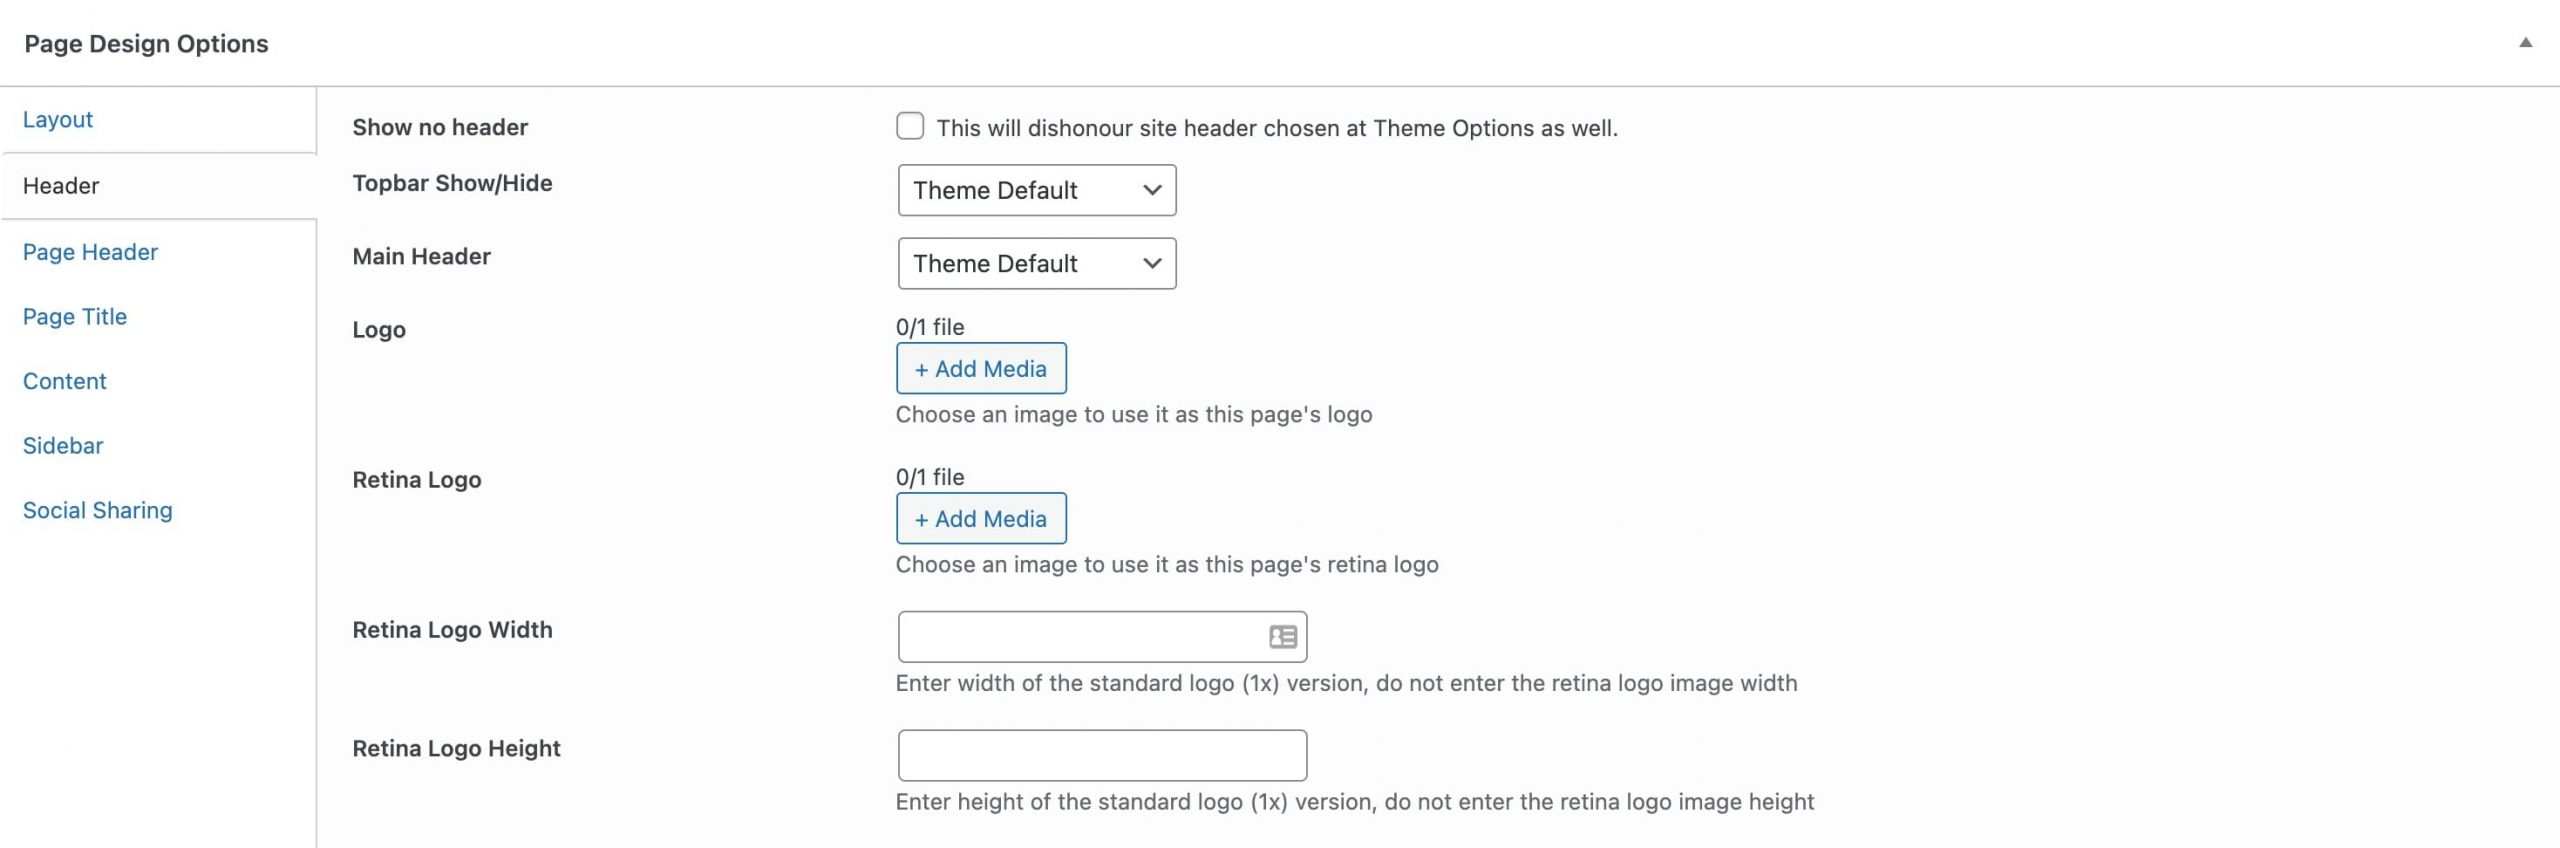
The above meta box can be found on any page/post while creating/editing it. These options are used to use a different header style or a different logo for that respective page/post. Here you can disable the header as well.
Page Header
This is part of the header which is just below/behind the logo/menu header. This area also display breadcrumbs when the required plugin is active on your website. See page header example below:
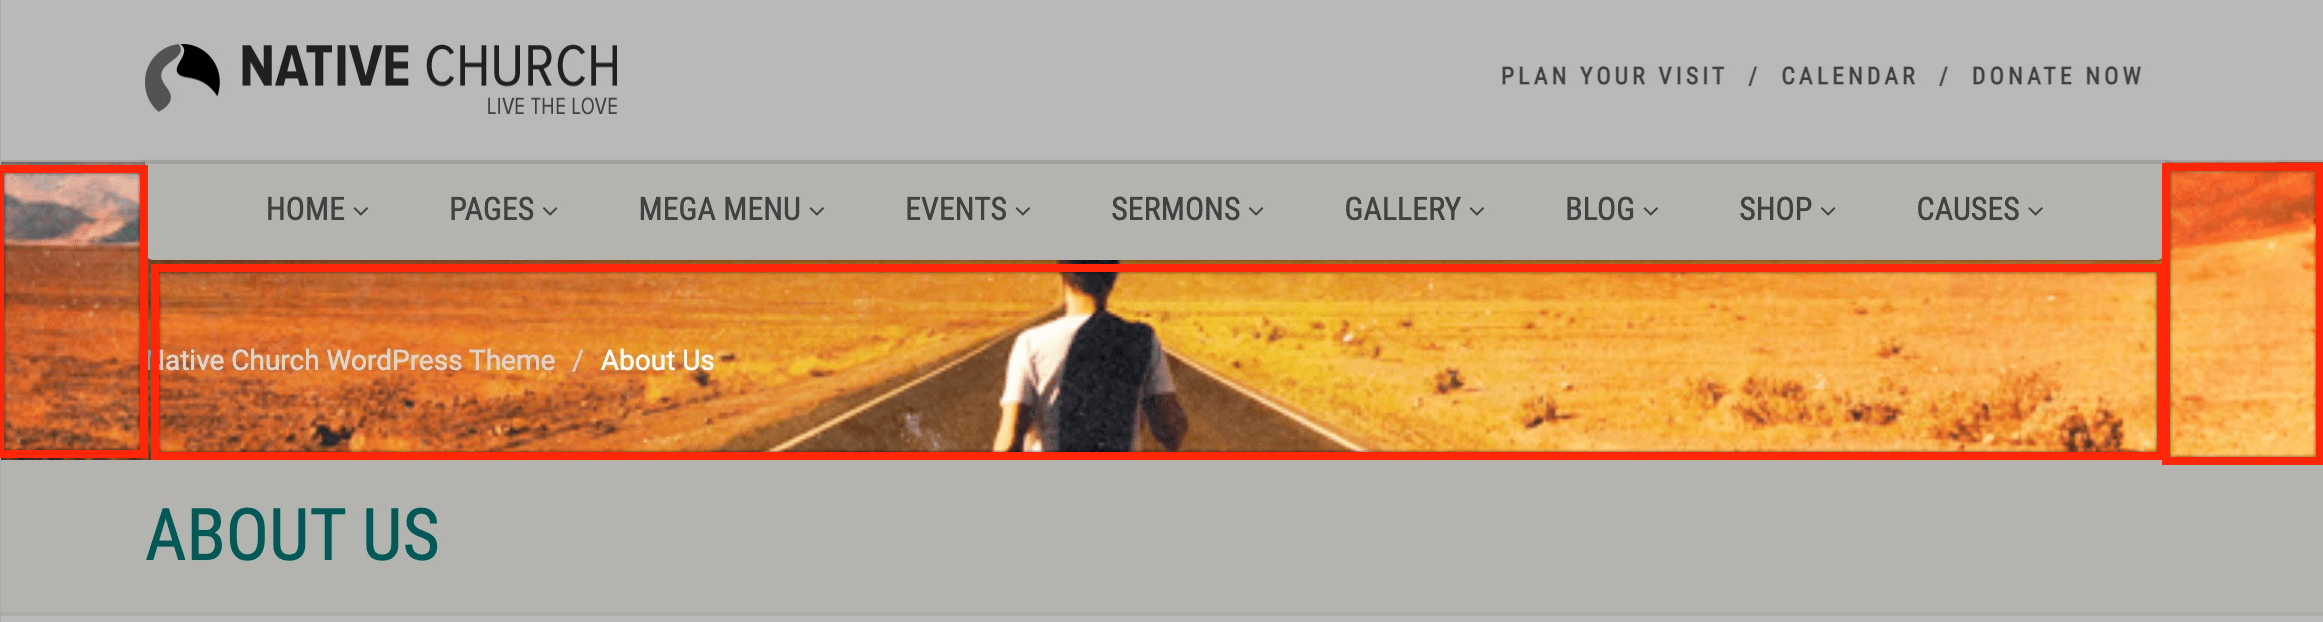
There are multiple options available for this particular area of the header like a singe color, an image, multiple image flexslider or Revolution slider. This area raise upto top of the website on the homepage or when Header style 5 is used.
All the options of the page header can be found in the below metabox while creating/editing a page/post:
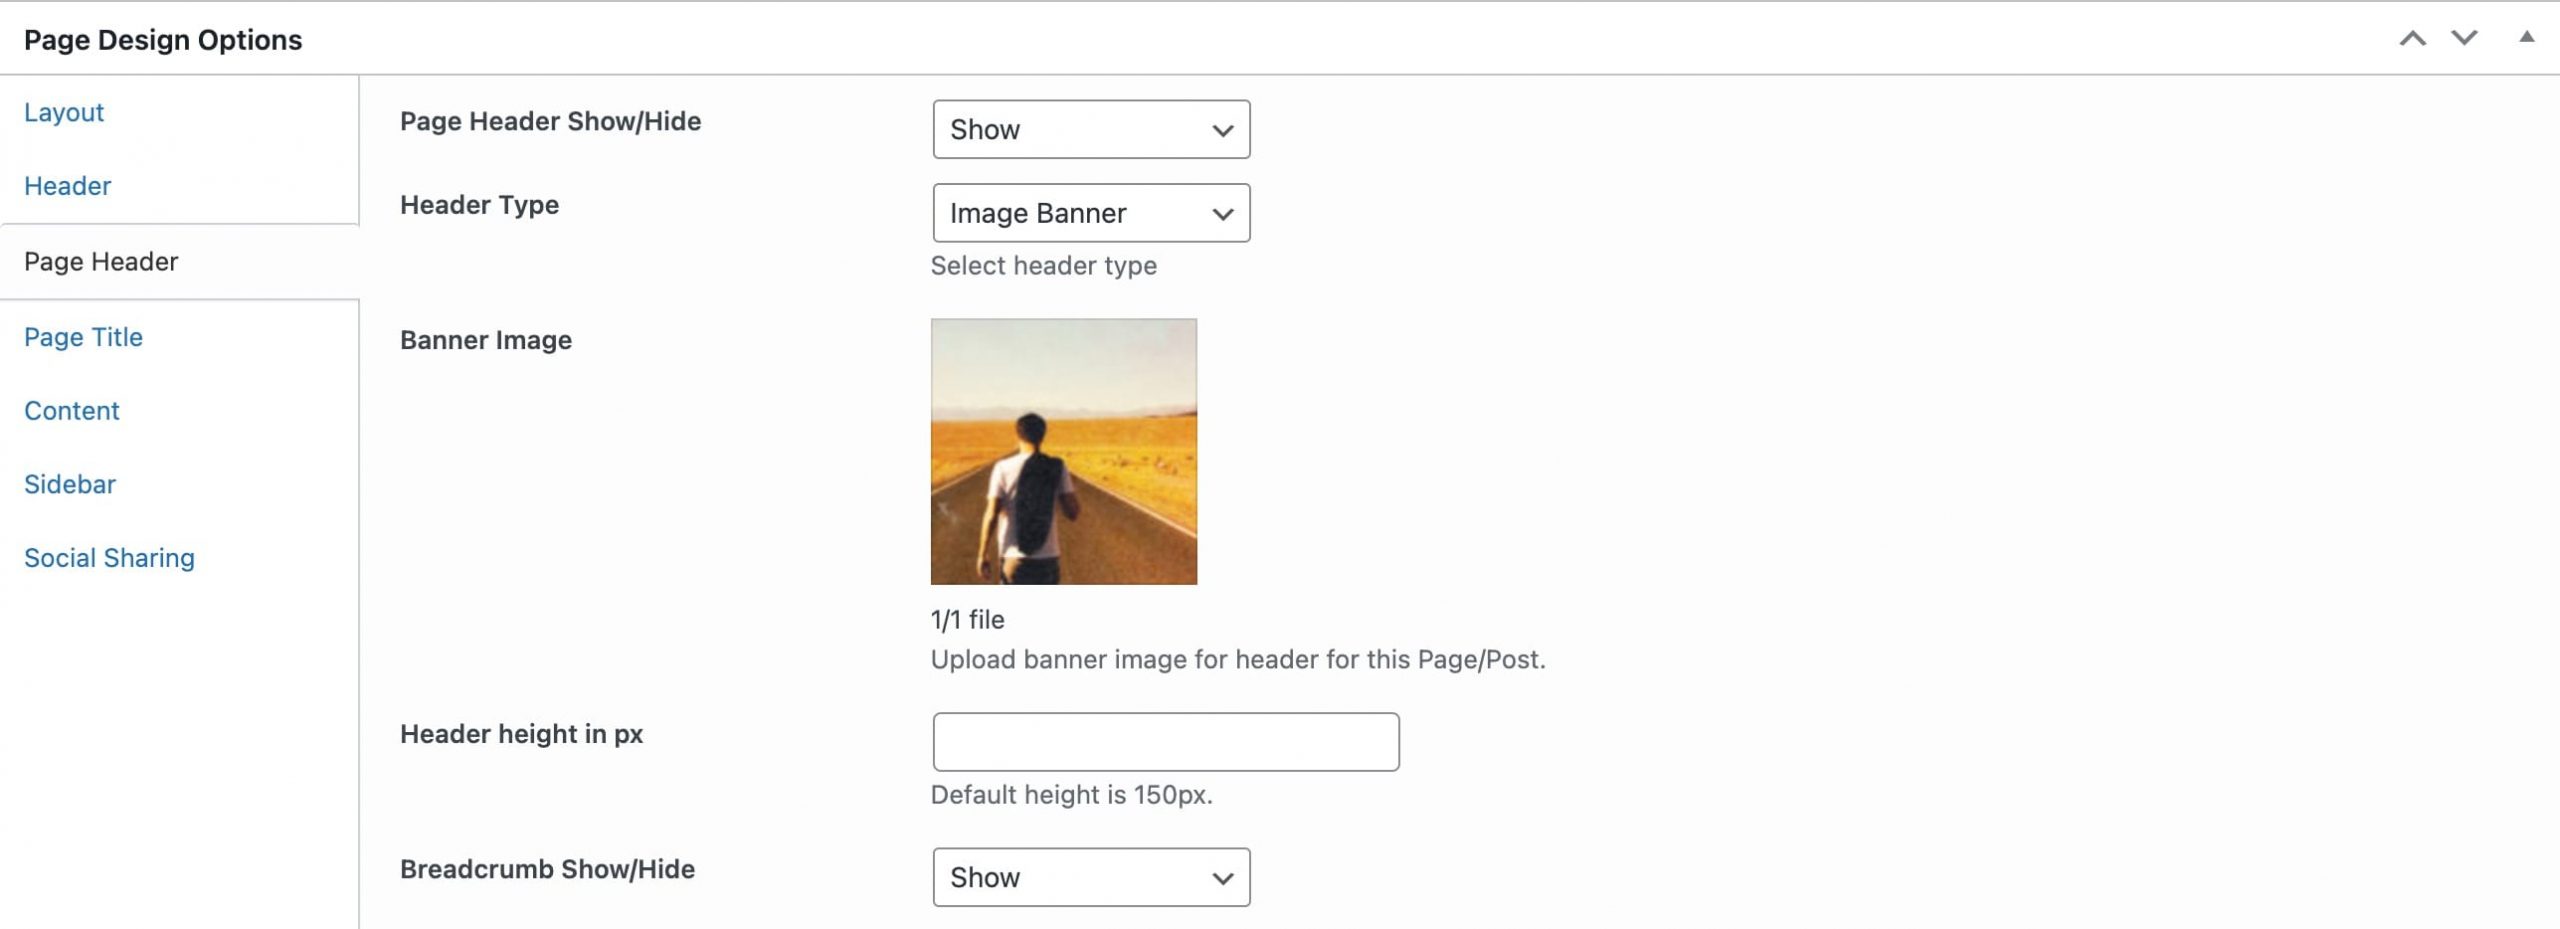
All the options available here are self explanatory, however when using the ‘Flexslider’ option there are some other things you can do like display some text over the slide images and can also link them to some URL of your choice. To do so, just hover over any image added for the flexslider and click the edit(pencil) icon:
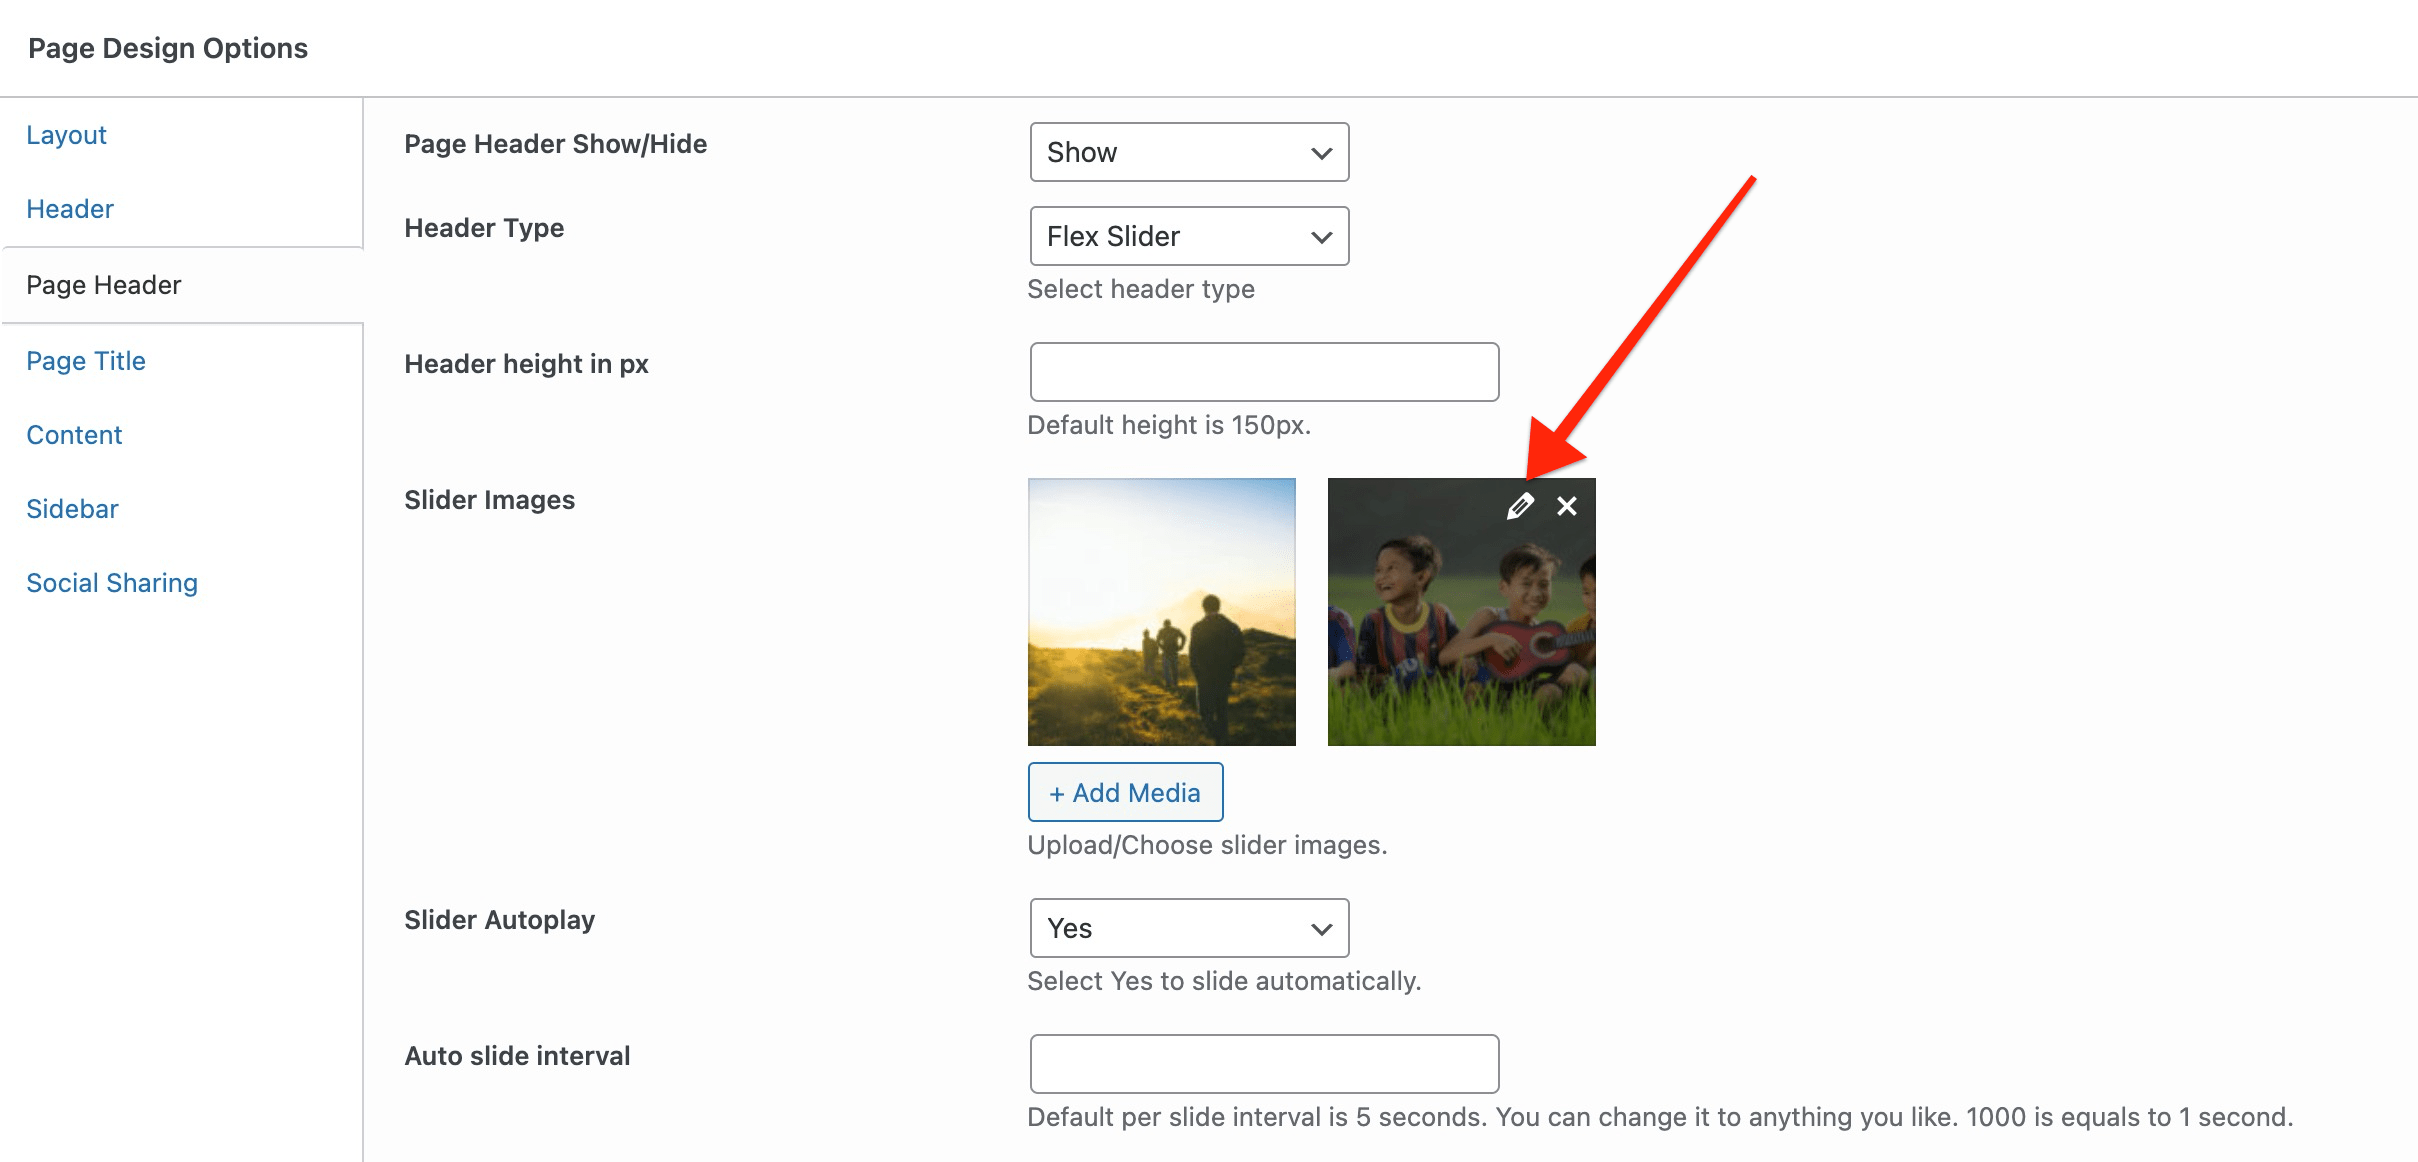
Enter the details for the image in the popup window which comes next. It will save the data by own once you click out of the fields.

Default image banner for inside pages can be set from your WP Dashboard => Native Church => Theme Options => Header => Inner Page Header

Page Title Bar
The very last part of the site header is page title which is displayed for all the inside pages and will be hidden for the page which is set as ‘Front Page’ at your Settings => Reading

There are no global options available for this part but you may choose custom settings for this part while creating/editing your pages/posts.
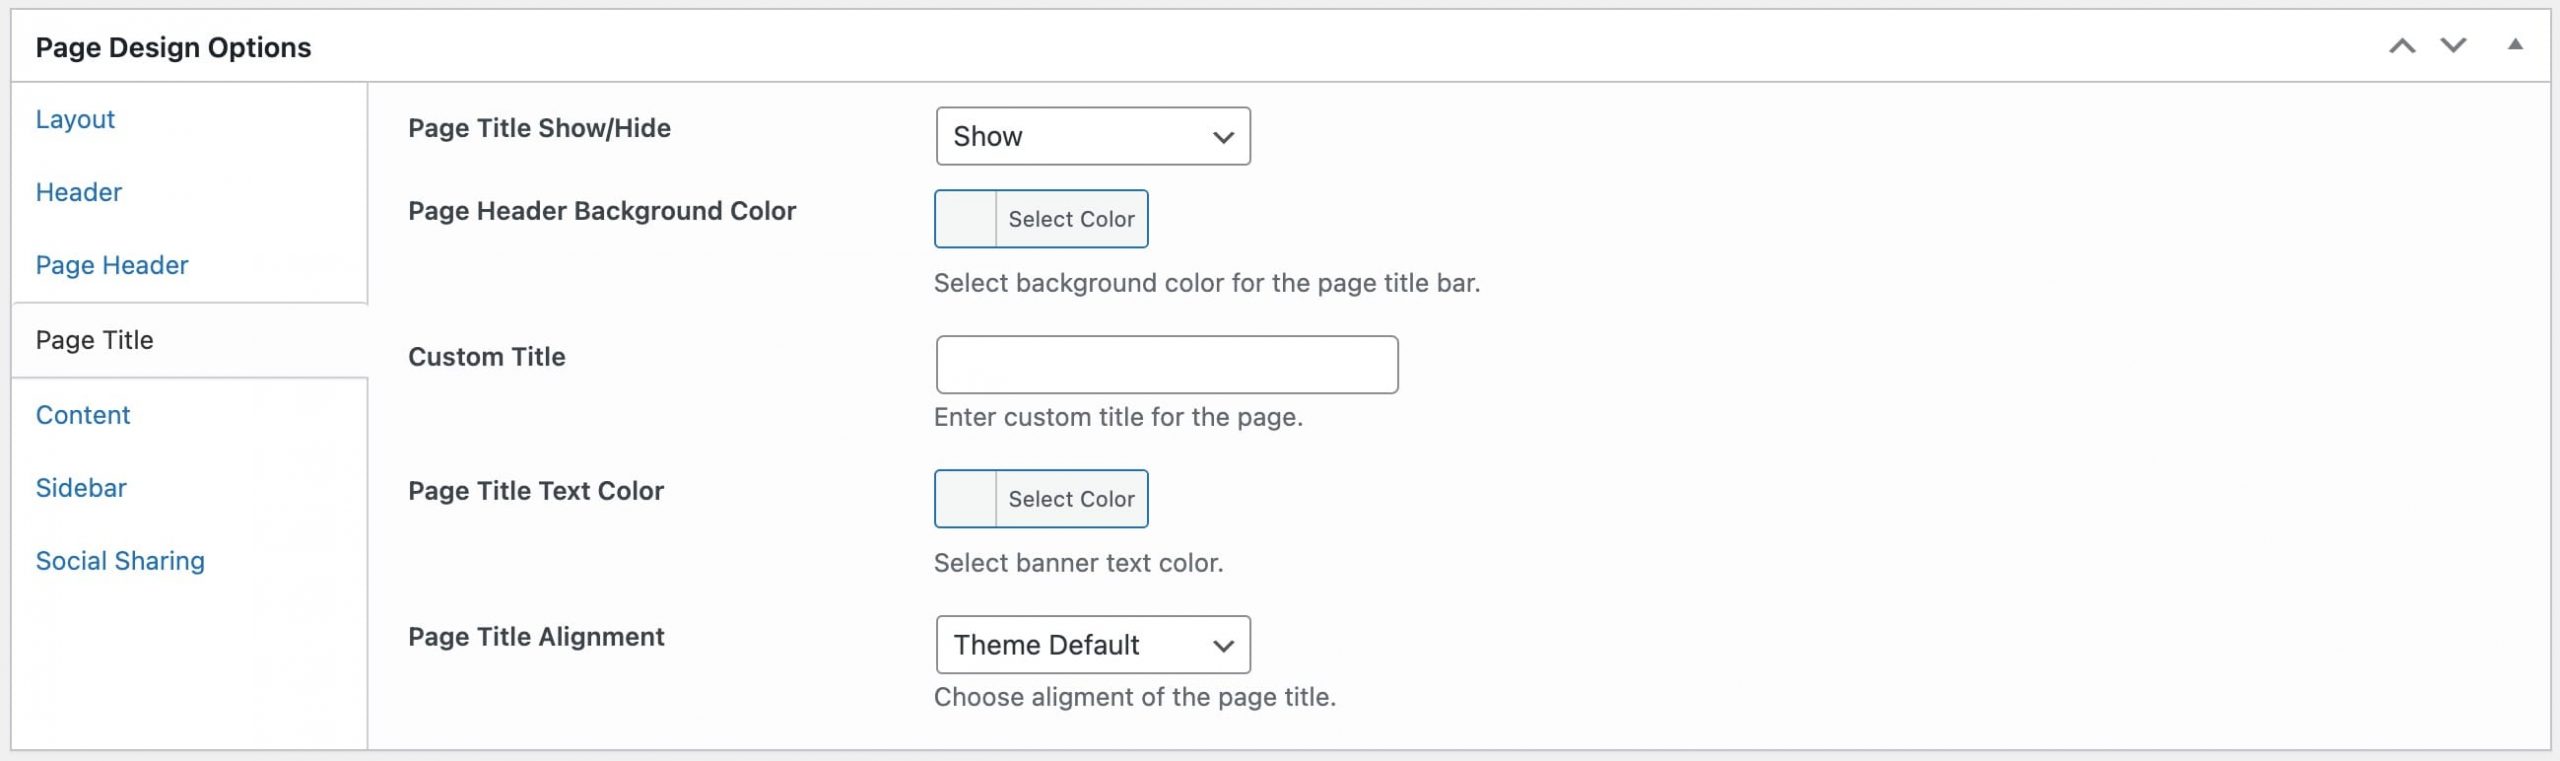
Available options are as follows:
- Hide page title bar for any page/post
- Choose a different background color for the title bar
- You may add a custom title for your page/post here
- Choose your desired color for the page title text
- Choose alignment for the title text