You can install iPray just like any other WordPress plugin.
Upload the ZIP file
-
Log in to your WordPress Admin.
-
Go to Plugins → Add New.
-
Click Upload Plugin.
-
Choose the ipray.zip file.
-
Click Install Now.
-
Click Activate once installation finishes.
After activation:
-
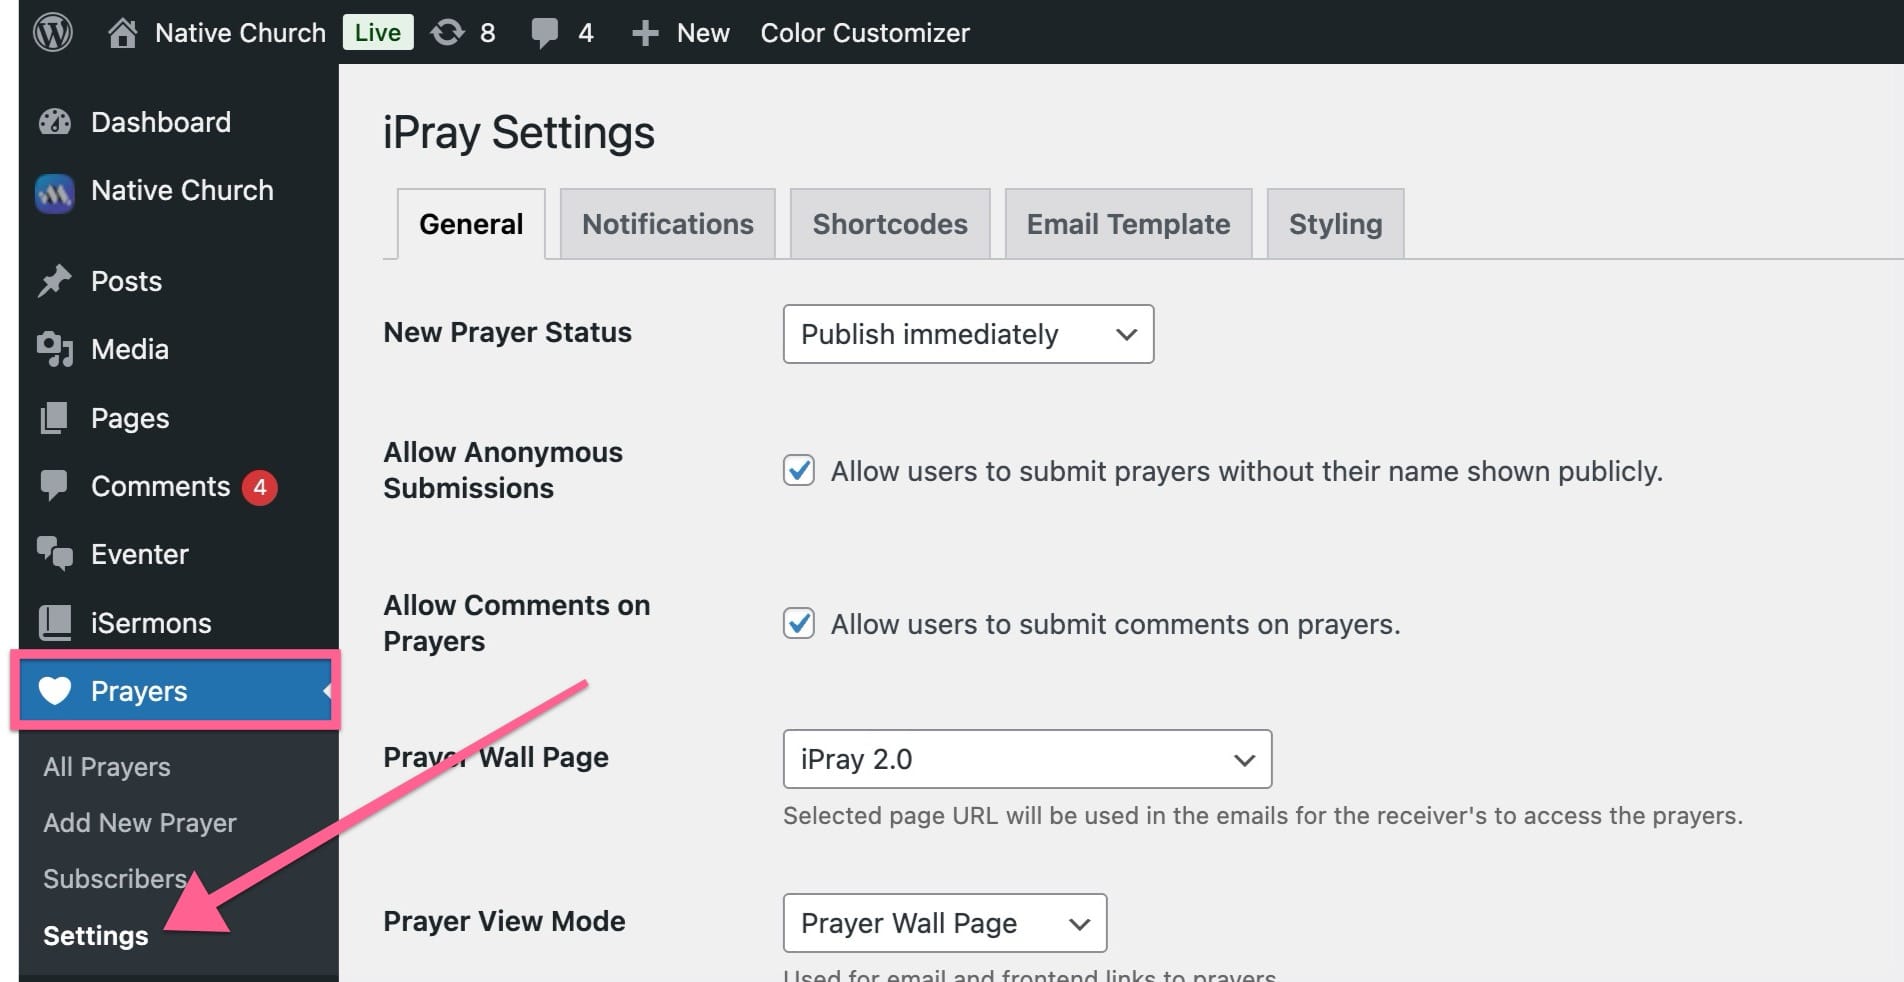
A new menu “Prayers” appears in the left admin sidebar.
-
A Settings submenu is added under “Prayers”.
Where to Find iPray Settings
All plugin options are under the Prayers menu:
Prayers → Settings
This opens the iPray Settings screen, which uses tabs to organize options:
-
General
-
Notifications
-
Shortcodes
-
Email Template
-
Styling
Creating Core Pages
iPray uses shortcodes. You can create one or more pages depending on how you want to structure your site.
1. Prayer List / Wall Page
This is usually your main public “prayer wall”.
Recommended shortcode:
[ipray_list]
This displays the list/grid of published prayers, including:
-
Prayer content
-
“I prayed for this” button
-
Optional pagination
-
Optional grid layout
You can customize it later with attributes (explained in the Shortcodes section).
OR to use the combined legacy shortcode:
[ipray]
This is the legacy shortcode that can show the list + form in a single output, depending on how it’s set up. For new installs, it’s recommended to use separate shortcodes so you have more control:
-
[ipray_list]
-
[ipray_form]
-
[ipray_subscribe_form]
-
[ipray_dashboard]
2. Prayer Submission Form Page
If you want a dedicated page just for the submission form (separate from the list):
[ipray_form]
This shows the AJAX form for submitting a new prayer request.
Fields include (based on the actual form template):
-
Name
-
Email
-
Phone
-
Prayer request text
-
“Submit anonymously” option (if enabled in settings)
-
“Email me when someone comments on this prayer” (if comments + notify option enabled)
There’s also an invisible honeypot field and (optionally) a country detection field if enabled in settings.
3. Subscription Form Page
To allow users to subscribe to prayer updates:
[ipray_subscribe_form]
This displays a subscription form for weekly digest / new prayer notifications (controlled from the Notifications tab).
4. User Dashboard Page
The dashboard lets users see and manage their own submitted prayers via a magic email login link.
[ipray_dashboard]
This:
-
Shows a small login form asking for the user’s email
-
Sends a “magic link” email to that address
-
When clicked, it logs them in to the dashboard view for that email
-
Displays their submitted prayers (with delete option, depending on settings/shortcode config)