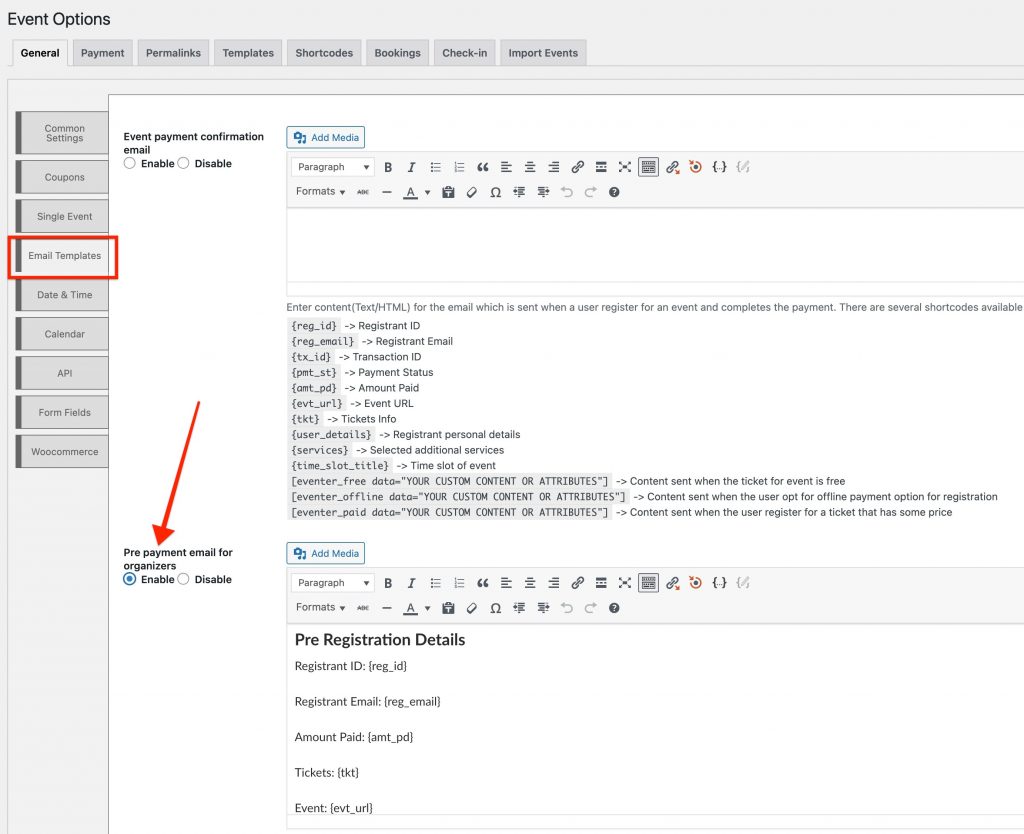
Organisers are an important part of the Eventer plugin. This is used to allow you to have a separate organiser for each of your events. Each organiser can have its own email which helps sending booking confirmation to the organiser of the respective event.
Organisers are also available in the filters section of the event listings. See how to display events on your website

Organiser Contact Form
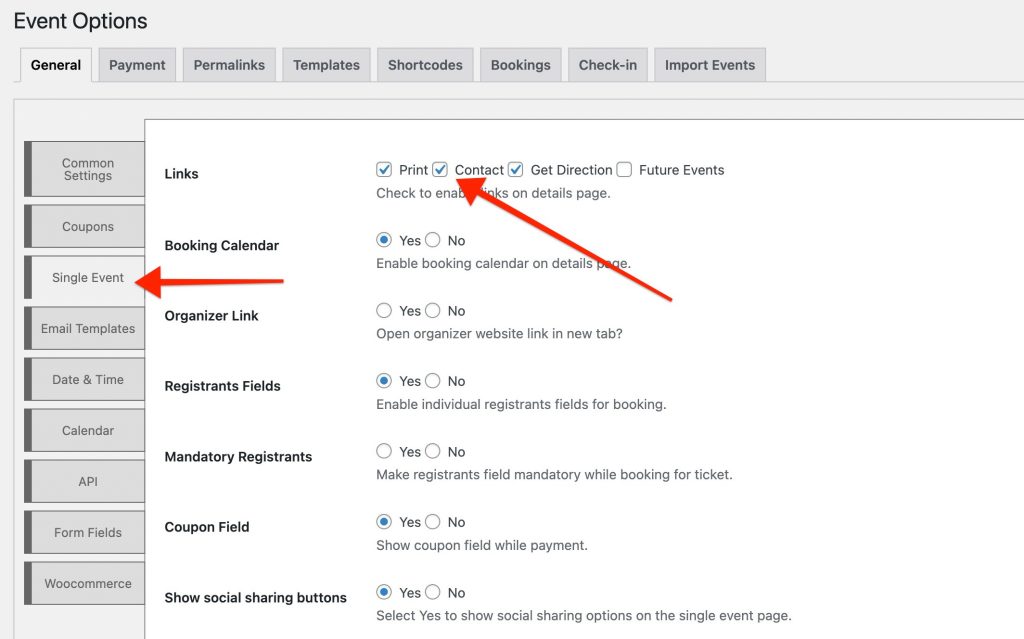
On the event details page, you can show a ‘Contact’ link which opens a contact form which can send email directly to event organiser assigned to a respective event. To show this button go to your WP Dashboard => Eventer => Settings and check the ‘Contact’ option
A dedicated ‘Organiser’ contact box on the event details page is also displayed when you have Organiser picture/logo and email inputted for the organiser of the event.

Edit Organiser Contact Form
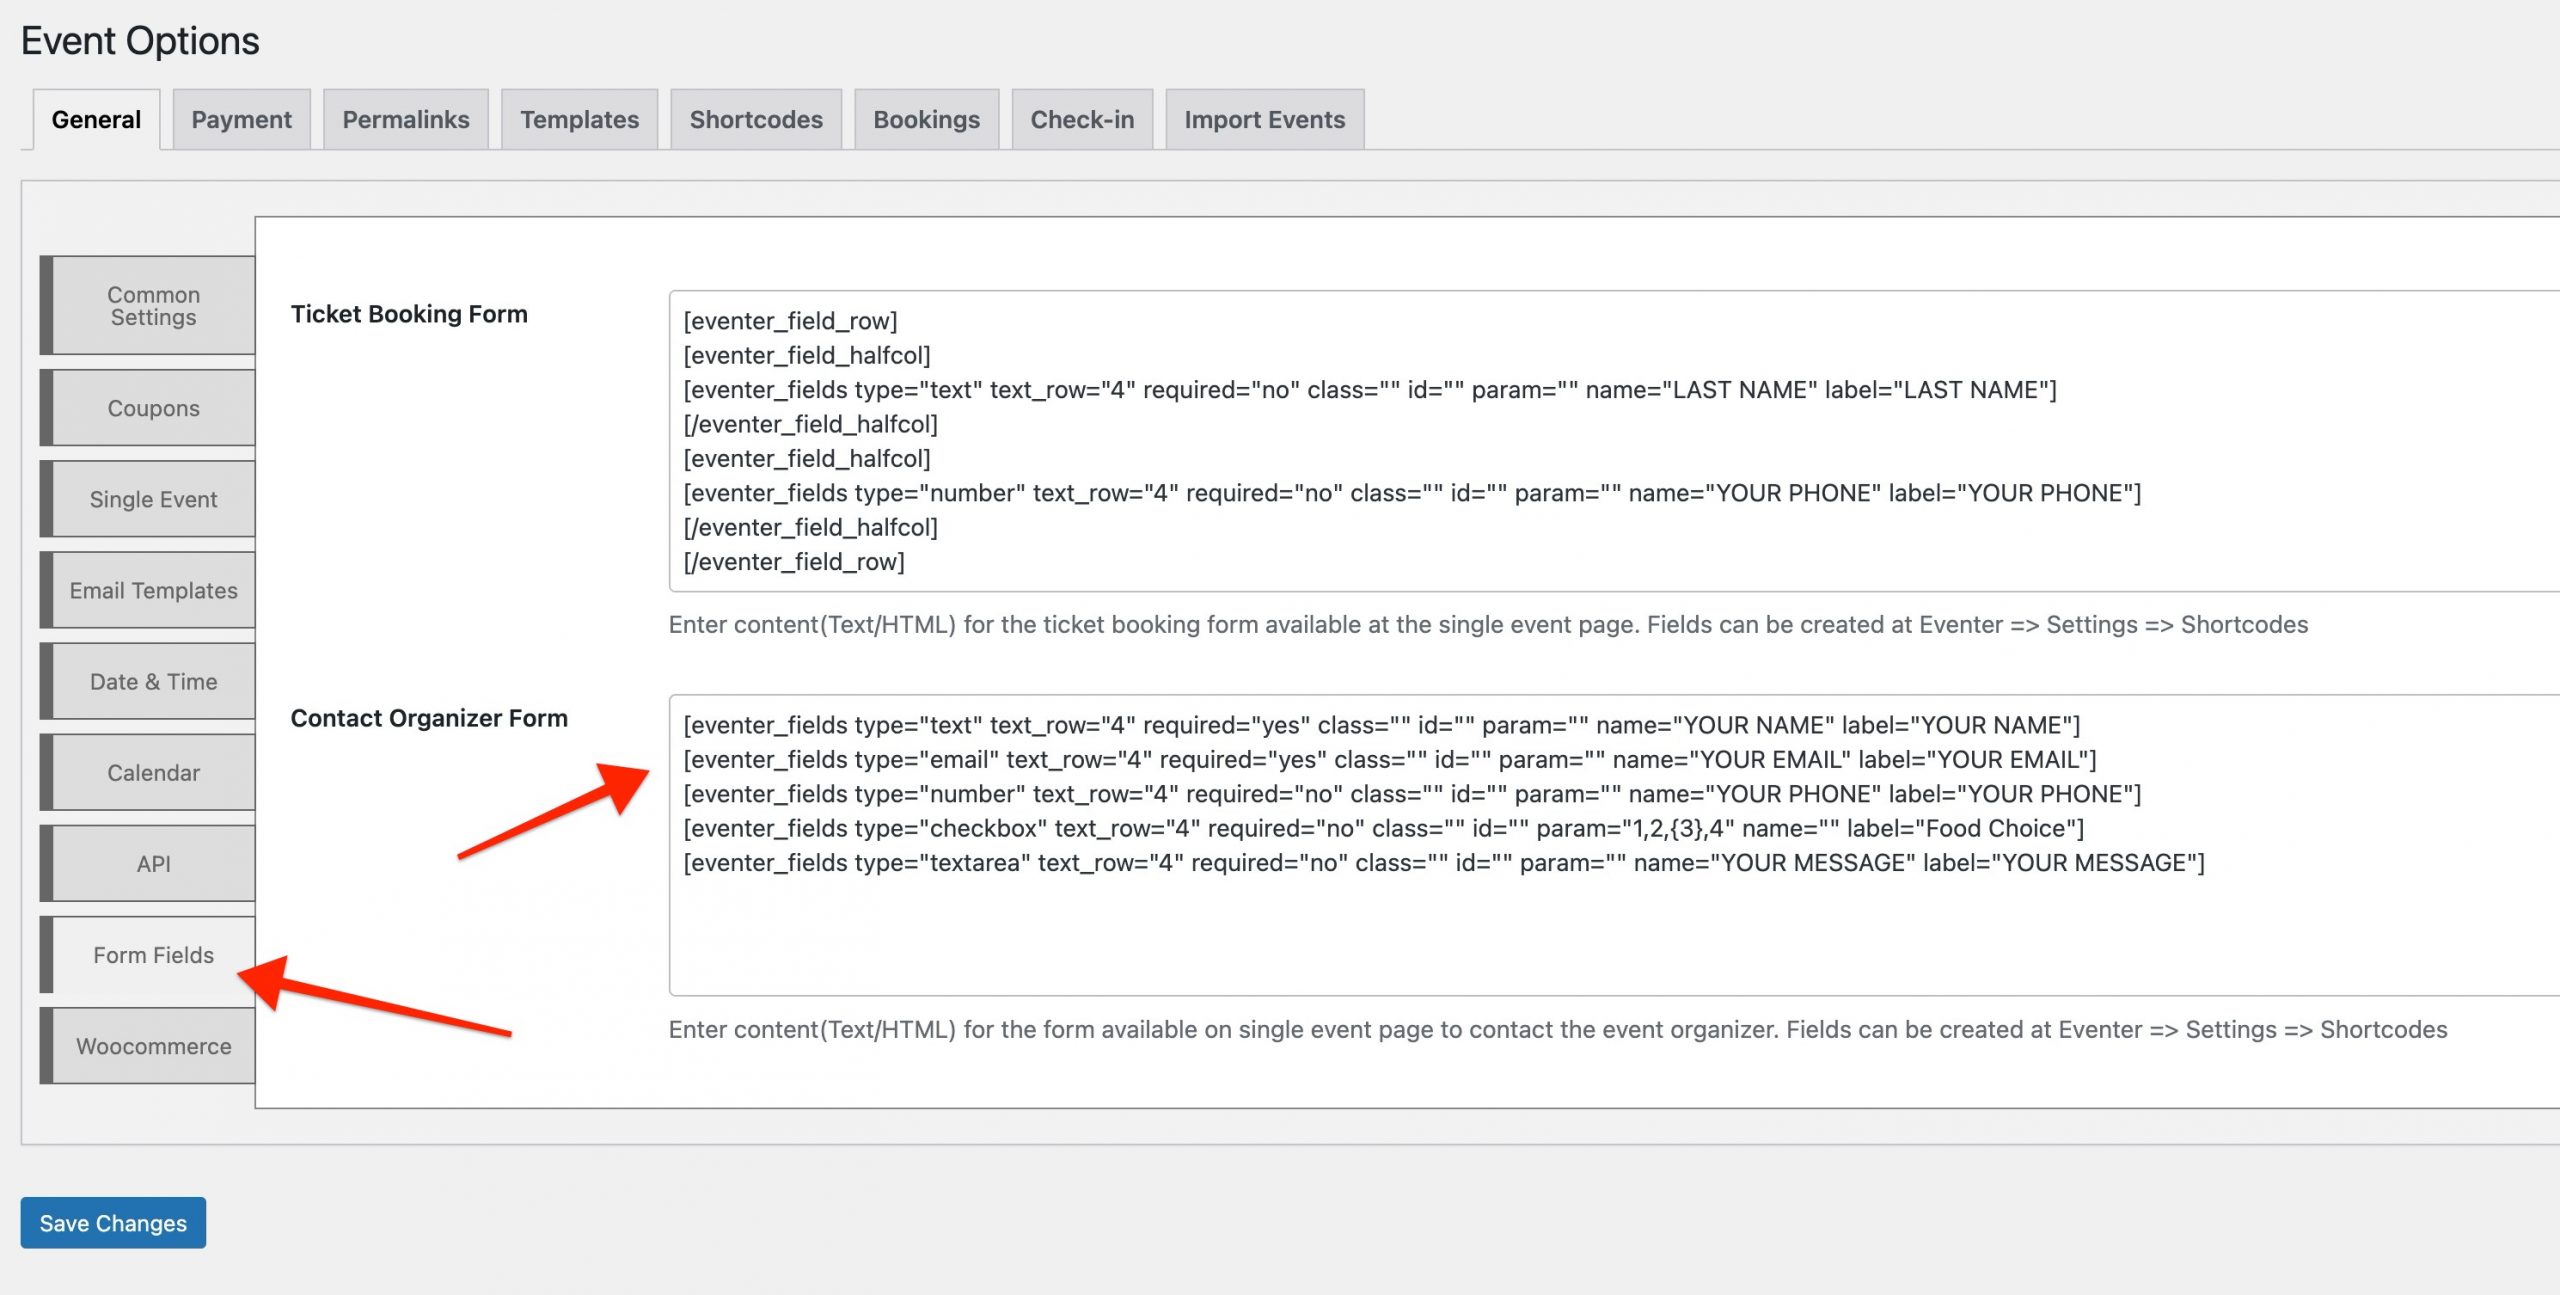
Organiser contact form remains common for all the organisers of your website. But this form can be edited with any fields of your choice. To add/remove the fields, move to your WP Dashboard => Eventer => Settings
Contact Form Shortcodes:
We use exclusive shortcodes to build the organiser contact form which helps you easily modify the form as per your need. Here are the shortcodes for the rows and columns:
Row: This shortcode create a new row in the form. You should insert a new row only if you need to divide the row into 2 columns.
[eventer_field_row]


[/eventer_field_row]
Column: This shortcode create a new half column inside a row and should be put inside a row shortcode. See example:
[eventer_field_halfcol]

[/eventer_field_halfcol]
To add a field which uses full width of the form then put the form field shortcode directly outside the column or row shortcode
Form Fields: Eventer offers multiple type of fields for your form including checkboxes, radio buttons. New fields shortcode can be created from your WP Dashboard => Eventer => Setting => Shortcodes

To create a ‘Form Field Shortcode‘ there are several options you must fill before generating it.
- Select Field Type: Select your field type, you have several options for the field type and it must be selected as required. To understand the field types check out this article
- Select Textarea Rows: In case you select ‘Textarea‘ as field type then you can select the ‘textarea rows’ option. This option defines the default height of the textarea when the form loads. Selecting more rows means more height. Textarea is always expandable manually though.
- Mark Field Mandatory: If you want to ask an important question to people contacting the organiser then mark your selected field as ‘Mandatory‘
- Field Classes: Sometimes you may want to style your field differently, in this case we recommend adding your custom ‘Class‘ to the field. You can add them here and it will be applied to the field in the form.
- Field ID: This must be filled with a unique name as ‘ID‘ of your field. ID is used to recognise the field in your form and to use the field value in the email sending to the organiser. An ID must be unique for each field you create and must not contain any spaces, no special characters(except – or _) and it should start with an alphabet. For example: ‘my-email-field-1‘
- Field Values: Select, Radio, Checkbox fields let you create options field. You must add options for the field here. Separate your options by a ‘,‘ (Comma). Wrap value with curly braces to select an option by default,. For example:- {abc},def,ghi. Here abc will be default selected value of the field.
- Field Name: A field name must be unique for each field, we recommend using your ‘Field ID‘ as field name as well.
- Field Label: A label will show just above the field. It is best to add a label so user always know what they are filling in
- Field Meta Key: This is a unique key which helps the Eventer plugin store the data of the field. We recommend using a unique name for each field. Meta key must not contain any spaces, no special characters( except _ ) and it should only include alphabets. For example: ‘my_field_key‘
How to add event organisers
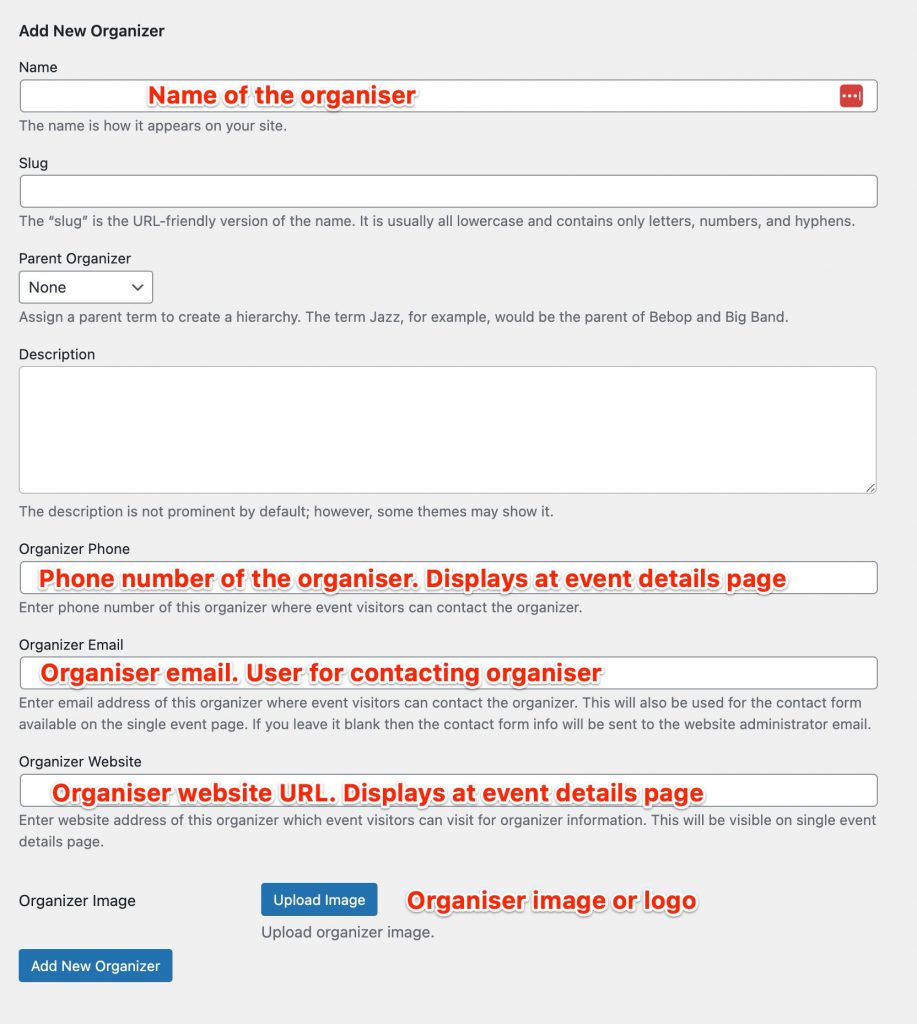
You can add organisers while creating a new event from the right sidebar or from your WP Dashboard => Eventer => Organizers
When someone books a ticket for an event and you have an organiser attached to the event, the organiser will receive an email. This email can be enabled & managed from Eventer Settings
By default all ticket booking emails are sent to website ‘Administrator’ email set at WP Dashboard => Settings => General